Intern 快速 Landing+环境搭建
Intern 快速 Landing+环境搭建
item2下载
Mac 终端工具
https://iterm2.com/downloads.html
homebrew下载
Mac 软件包管理工具
brew换国内源:
1 | export HOMEBREW_INSTALL_FROM_API=1 |
ohmyzsh配置
ohmyzsh 在插件比较多的情况下加载非常慢,可以考虑使用 zinit 代替
安装ohmyzsh:
1 | sh -c "$(curl -fsSL https://raw.github.com/ohmyzsh/ohmyzsh/master/tools/install.sh)" |
安装常用的插件
1 | git clone https://github.com/zsh-users/zsh-completions.git ~/.oh-my-zsh/custom/plugins/zsh-completions |
配置zshrc(~/.zshrc)
1 | ZSH_THEME="ys" |
tmux配置
tmux的配置文件:~/.tmux.conf
1 | set -g default-shell /bin/zsh |
tmux使用技巧
通过tmux命令打开一个session,并有一个window
然后通过ctrl+a c命令可以打开一个新的window ctrl+a & 关闭当前window
shift+ ⬅️ 切换到左边的window
shift+ ➡️ 切换到右边的window
在一个window内可以通过ctrl+a h进行横向增加pane, ctrl+a v纵向增加pane
ctrl+a+ ⬅️ 切换到左边的pane
ctrl+a+ ➡️ 切换到右边的pane
ctrl+a+ ⬆️ 切换到上面的pane
ctrl+a+ ⬇️ 切换到下面的pane
在一个window中开启所有的pane都执行同一个命令: ctrl+a y
在一个window中关闭所有的pane都执行同一个命令: ctrl+a n
Windows下通过WSL搭建开发环境
通过在Windows中启用WSL,达成类似Linux下开发的效果
- 安装Docker Desktop
- 安装VSCode+WSL插件
- 启用WSL: 通过管理员权限在PowerShell中运行
Enable-WindowsOptionalFeature -Online -FeatureName Microsoft-Windows-Subsystem-Linux -All - 对于WSL2,需要下载Linux内核更新包
- 通过Microsoft Store安装Ubuntu 22.04后并打开
- 通过Terminal打开WSL窗口后,可直接使用code命令通过VSCode打开文件夹等,也可以通过docker命令与Docker Desktop交互
- 在WSL中可以通过访问/mnt/c/Users/
/Downloads访问下载文件
Golang配置
配置Go module代理加速
1 | go env -w GO111MODULE=on |
配置私有Gitlab
1 | go env -w GOPRIVATE=gitlab.xxxxx |
VSCode插件
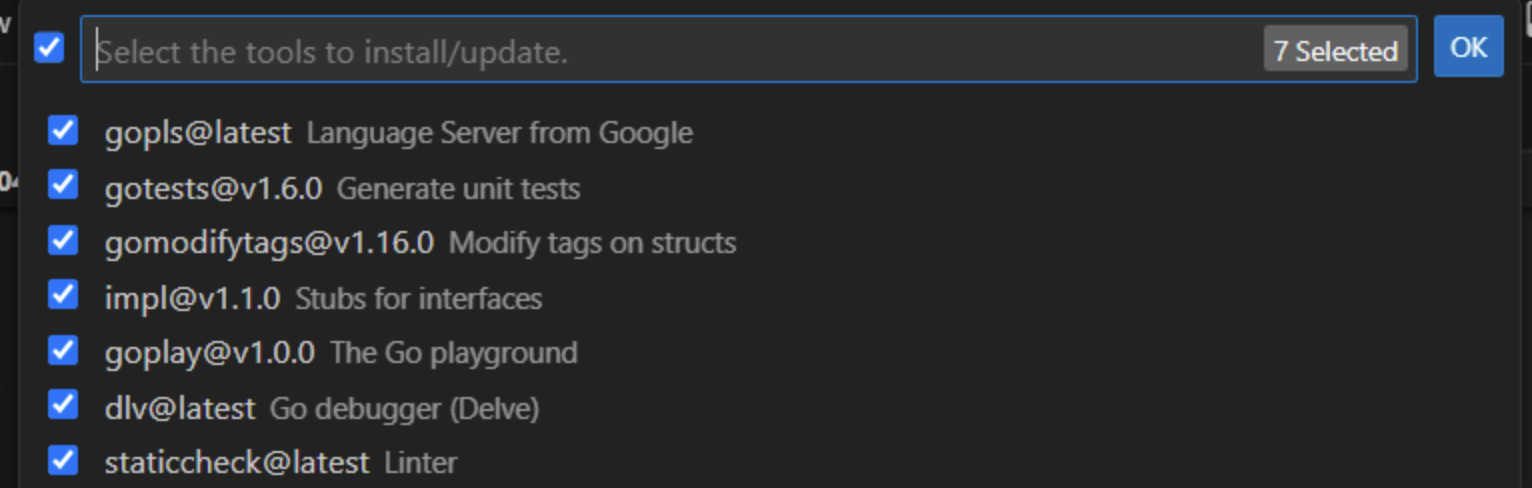
- Go
Ctrl+P > Type “> go install”
Protoc
- Linux/WSL, using
aptorapt-get, for example:
1 | sudo apt install -y protobuf-compiler |
- MacOS, using Homebrew:
1 | brew install protobuf |
Kubectl设置自动补全
1 | source <(kubectl completion bash) |
下载安装4.24.4版本
https://github.com/protocolbuffers/protobuf/releases/tag/v24.4
下载相应系统的包,解压,将 protoc 拷贝到 /usr/local/bin下,include文件夹拷贝到 /usr/local下,默认只能是这个目录,项目中 protoc 没有用 -I 指定 protobuf 的 import 路径,protoc必须与 include包都放在/usr/local下
Python环境
uv配置
uv 是一个快速的 Python 包管理器和解析器,由 Astral 开发,旨在加速依赖项安装和解决。虽然 uv 主要用于包管理和依赖解析,但它也可以用于创建和管理虚拟环境。
以下是使用 uv 配置 Python 环境的具体步骤:
1. 安装 uv
首先,你需要安装 uv。uv 可以通过 pip 安装:
1 | pip install uv |
2. 创建虚拟环境
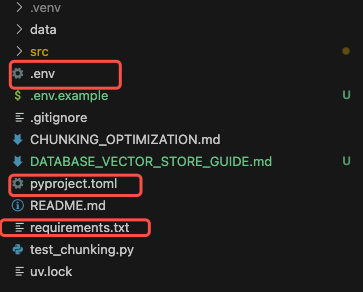
uv 可以通过 uv venv 命令创建虚拟环境。默认情况下,虚拟环境会创建在当前目录下的 .venv 文件夹中。
1 | uv venv |
如果你想指定虚拟环境的路径,可以使用 -p 参数来指定 Python 解释器的路径,或者直接指定虚拟环境的目录:
1 | uv venv myenv |
这将在当前目录下创建一个名为 myenv 的虚拟环境。
3. 激活虚拟环境
创建虚拟环境后,你需要激活它。激活虚拟环境的方式取决于你的操作系统:
-
在 Linux/macOS 上:
1
source myenv/bin/activate
-
在 Windows 上:
1
myenv\Scripts\activate
激活后,你可以在命令行中看到虚拟环境的名称,表示虚拟环境已经激活。
4. 安装依赖
激活虚拟环境后,你可以使用 uv pip 来安装依赖。uv pip 是 uv 提供的与 pip 兼容的命令,用于安装包。
1 | uv pip install <package_name> |
例如,安装 requests 包:
1 | uv pip install requests |
5. 管理依赖
uv 还支持从 requirements.txt 文件中安装依赖。你可以使用以下命令:
1 | uv pip install -r requirements.txt |
6. 退出虚拟环境
当你完成工作后,可以通过以下命令退出虚拟环境:
1 | deactivate |
7. 删除虚拟环境
如果你想删除虚拟环境,只需删除虚拟环境所在的文件夹即可:
1 | rm -rf myenv |
总结
使用 uv 配置 Python 环境的步骤如下:
- 安装
uv。 - 使用
uv venv创建虚拟环境。 - 激活虚拟环境。
- 使用
uv pip安装依赖。 - 使用
deactivate退出虚拟环境。 - 如需删除虚拟环境,直接删除文件夹。
uv 提供了快速的依赖解析和安装,适合用于加速 Python 项目的开发和部署。